Zapier is the ultimate automation tool, connecting thousands of different web apps to create powerful, custom workflows. When you connect Coupon Carrier to Zapier, you unlock the ability to deliver unique, single-use coupon codes from virtually any app in your marketing and sales stack.
This guide will provide a complete, step-by-step walkthrough of how to connect Coupon Carrier and Zapier. We'll cover the essential setup steps in both platforms and then build a practical, real-world example: automatically sending a unique "thank you" code to a respondent after they complete a Typeform survey.
Before you can build your Zap, you need two things from your Coupon Carrier account: your API Key and a "Zapier-triggered" configuration.
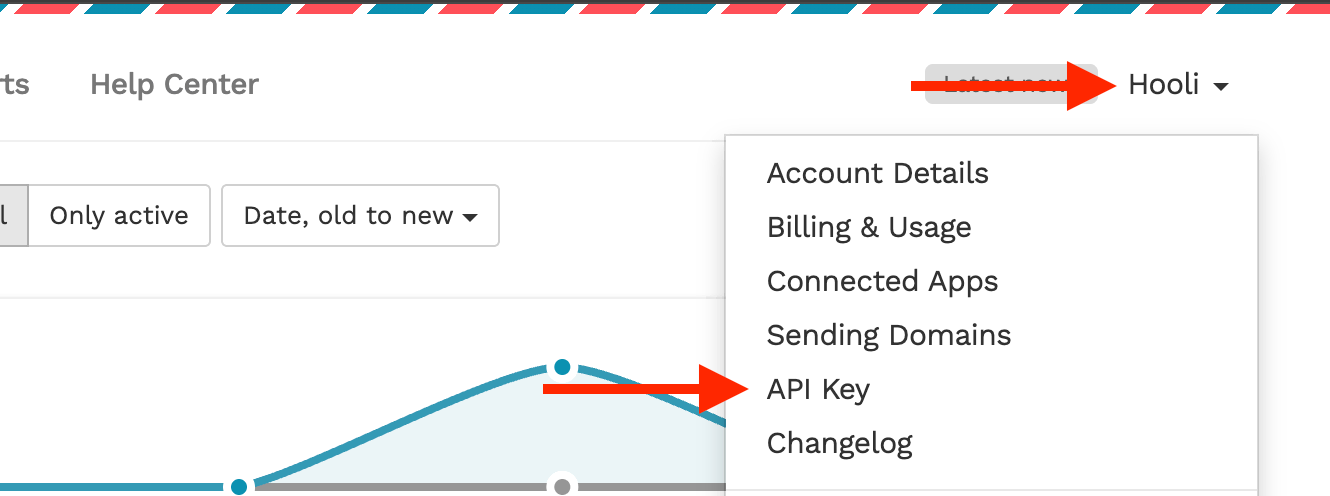
Your API key is how Zapier securely authenticates with your account. You can find it by navigating to your account dropdown menu and clicking on API Key.
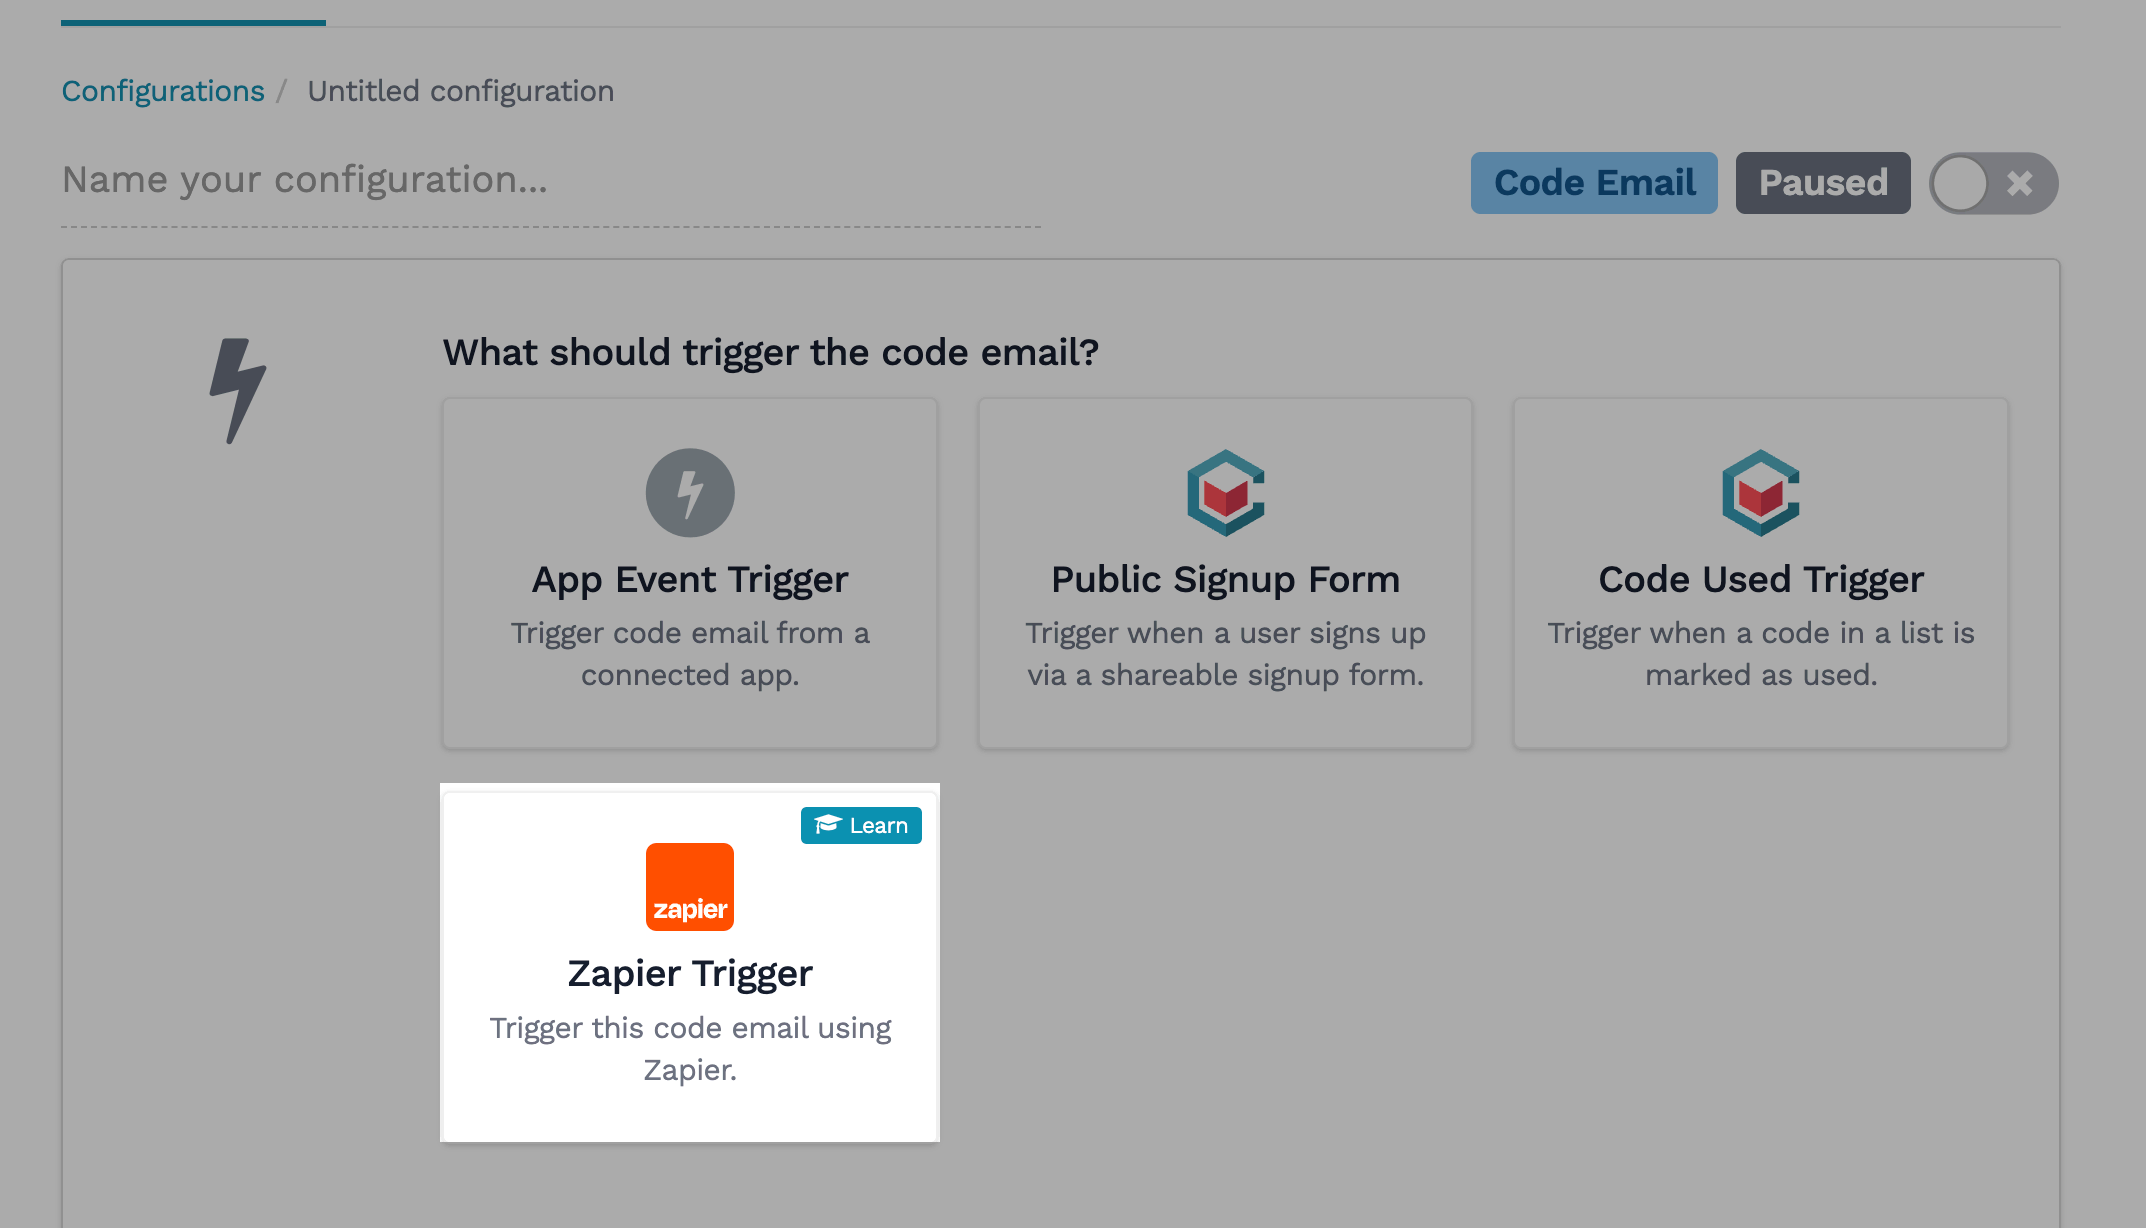
Next, create the specific email campaign you want Zapier to trigger. Go to Configurations > Create a New Configuration and select Code Email. For the trigger, choose Zapier Trigger. Customize the email content and connect it to a code list, then save and activate it. You'll select this configuration by name later in Zapier.
For this guide, we'll build a Zap that automatically sends a unique coupon code when someone submits a form in Typeform. You can use this same logic for any of the 8,000+ apps on Zapier.
In the Zapier editor, your first step is the Trigger. Search for and select your trigger app (in this case, Typeform). Choose the event that should start the workflow, such as "New Entry." Connect your account and select the specific form you want to monitor. Zapier will then test the trigger to pull in sample data.
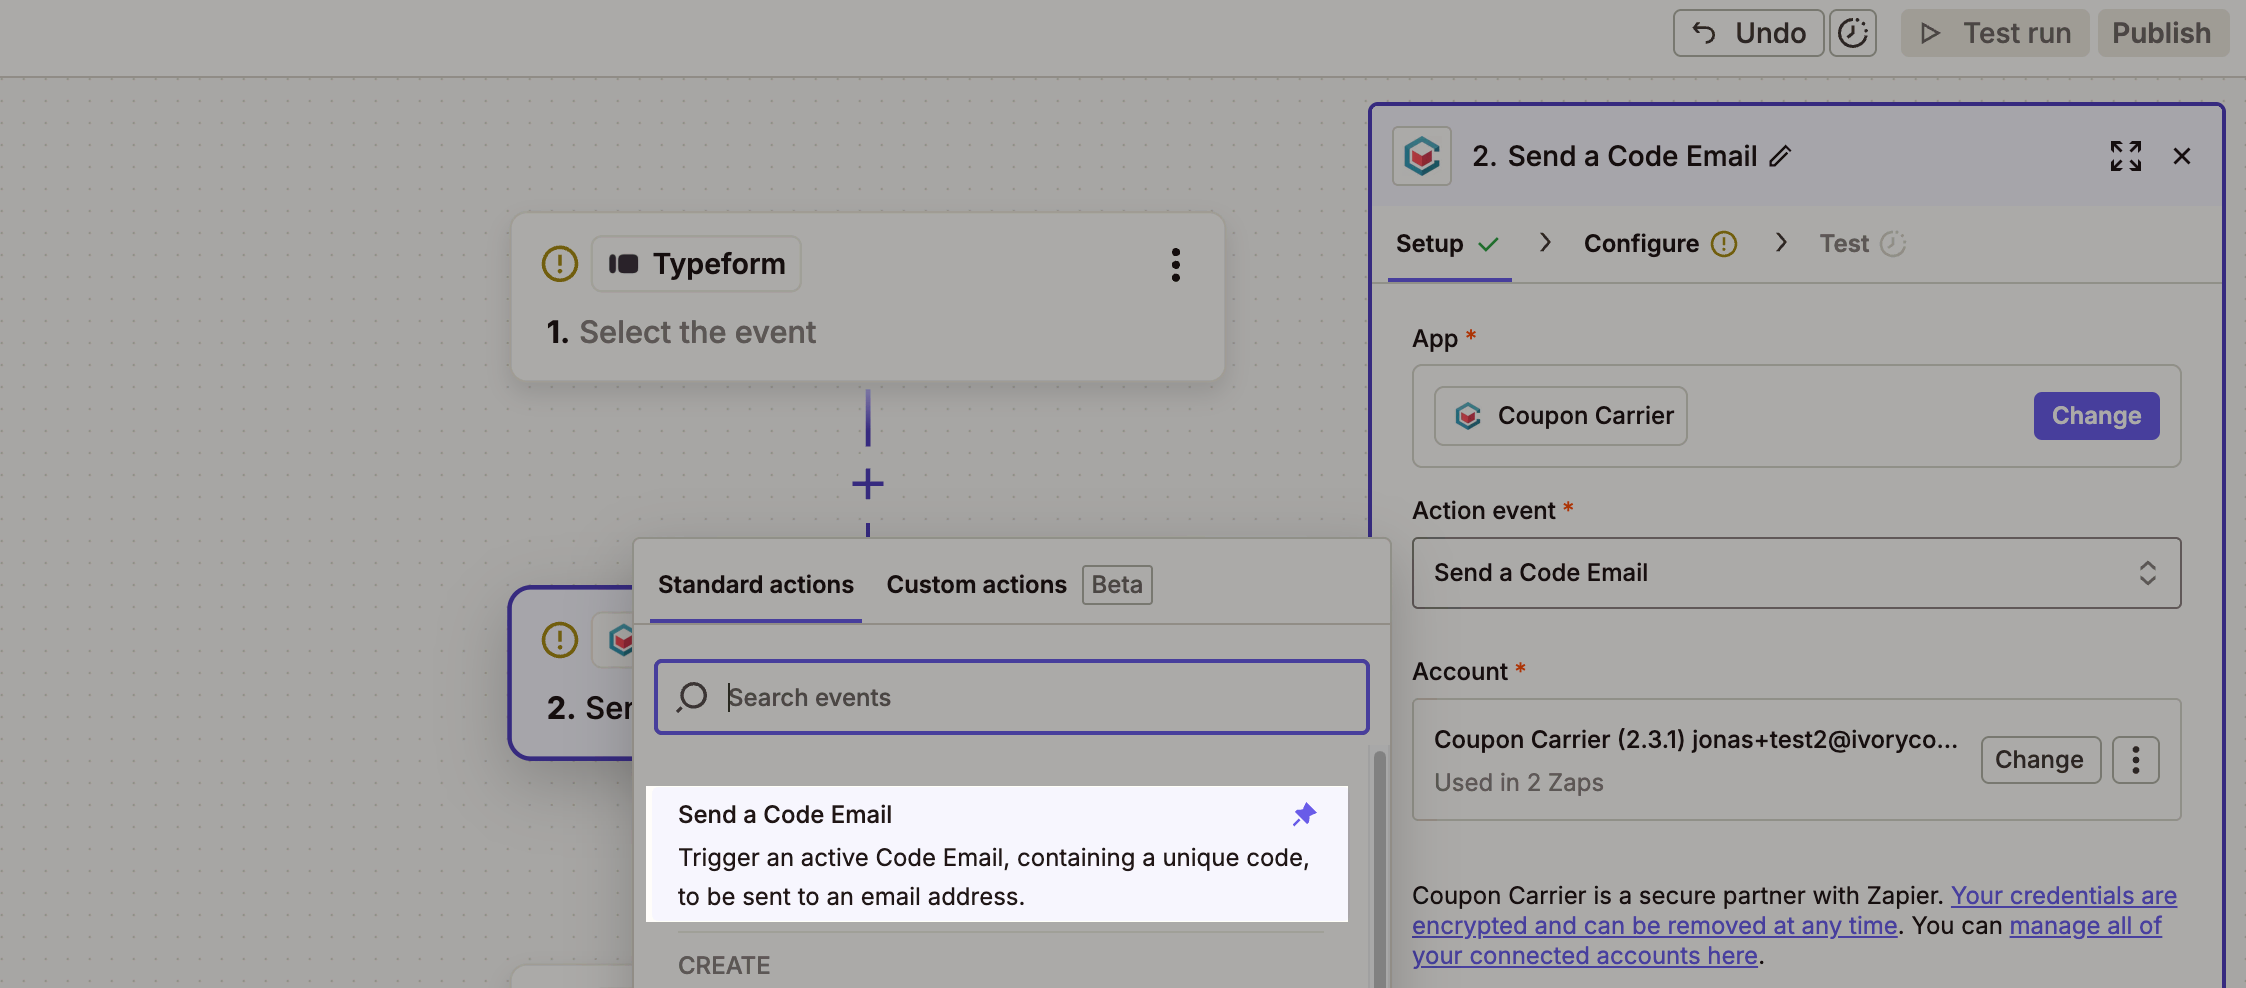
Now, add your second step: the Action. Search for and select Coupon Carrier. You will see a list of available actions you can perform. For this workflow, choose "Send a Code Email."
This is where you connect the data from your trigger to your action. You'll see several fields:
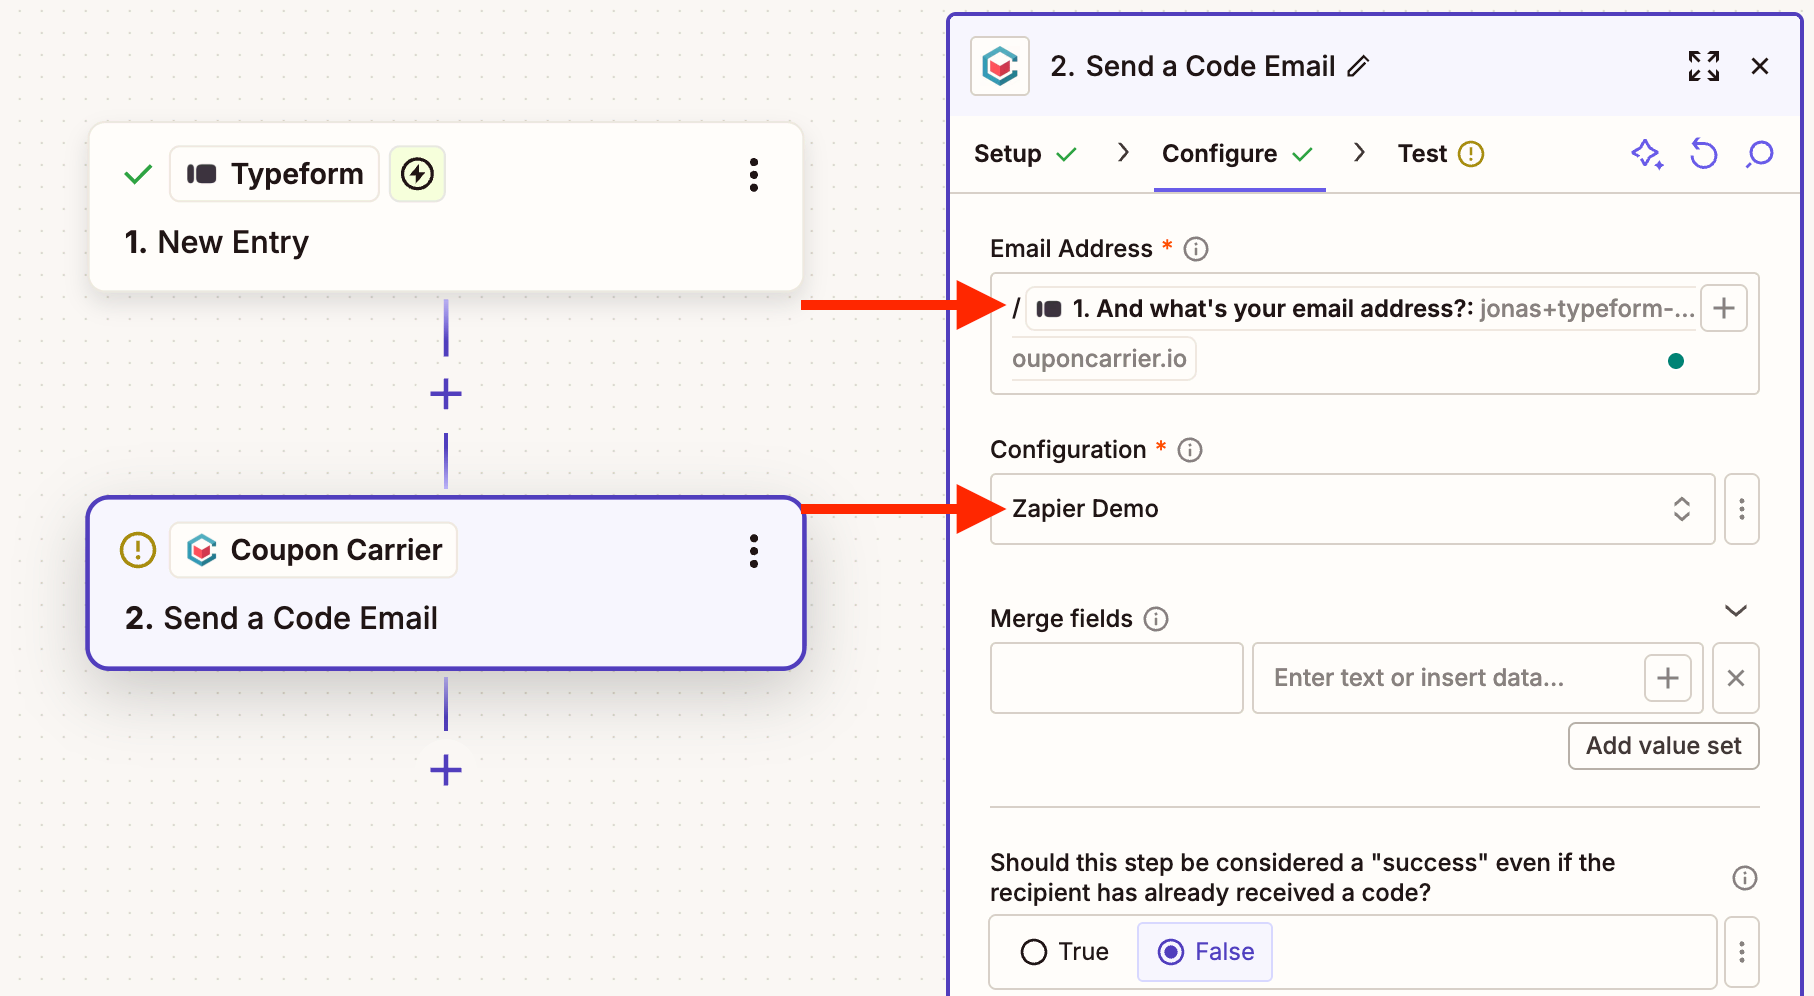
Once your fields are mapped, Zapier will allow you to test the step. This will send a real request to Coupon Carrier and deliver a real email to the sample email address from your trigger. After a successful test, you're ready to name and publish your Zap!
Sending an email is just the beginning. You can also use other Coupon Carrier actions in Zapier to build more advanced workflows:
You now have the knowledge to connect Coupon Carrier to any of the thousands of apps in the Zapier ecosystem. From fulfilling digital product sales with Stripe to rewarding new leads in your CRM, the possibilities are endless.